The Buffalo River winds through some of Arkansas’ best landscapes. Along its shores, you’ll find towering limestone bluffs, sand bars perfect for setting up camp, and plenty of spots to fish, swim, cliff-jump, or just relax on the river’s shores.
But floating the Buffalo takes some planning. You need to decide which section of the river to paddle, what kind of boat to use, and how to handle gear, shuttles, and water levels.
I’ve paddled the Buffalo five times across different sections, using both canoes and kayaks, and I’ve learned a lot and made a few mistakes along the way.
In this guide, I’ll share everything you need to know before floating the Buffalo River, from the best stretches of the river to the float, how to plan your trip, what to bring, and my technical tips for navigating the Buffalo River safely.


Which Section of the Buffalo River Should You Float?
The Buffalo River stretches 151 miles through northern Arkansas, and you can’t tackle it all in a day! So choosing the right section to float is key.
Your decision on which section to float mostly depends on the season and water levels, which can change quickly.

Best Section in Spring: Upper Buffalo
If you’re floating in spring or early summer, the Upper Buffalo, particularly the stretch from Ponca to Kyle’s Landing, is hard to beat. This section is widely considered the most scenic on the river, with massive bluffs flanking the sides of the river.
This area has some of the Buffalo River’s biggest bluffs, a waterfall hike, and plenty of gravel bars to stop at and explore.
However, this section of the Buffalo is very water-dependent. When the rain slows down, the water level drops quickly, and the upper Buffalo quickly becomes too shallow to float, especially in a canoe.

Summer: Middle & Lower Buffalo
By mid to late summer, your best bet is the Middle or Lower Buffalo. These sections have a more consistent flow, even when the rain slows down.
In the middle and lower sections, the current is a bit slower, the pools get longer, and it’s overall a more relaxed float. The long pools, particularly in the section between Buffalo Point and Rush also have good fishing areas.
These sections are perfect for swimming, fishing, and multi-day camping. The middle and lower sections are also generally more beginner-friendly.

Easiest Section to Float on the Buffalo River
The most beginner-friendly section to float on the Buffalo is the Middle Section. This stretch generally has a moderate, steady current and lots of gravel bars and sandbars to stop, rest, or picnic.
The middle Buffalo River is ideal for first-timers or anyone looking for a relaxing float without as much technical effort.
My recommendation is to call a few local outfitters before your trip. Let them know your skill level and comfort zone, and they’ll point you toward a section that’s floatable and safe. They deal with the river daily.

River Conditions Change Quickly on the Buffalo
One of the most important things to understand before floating the Buffalo River is that conditions change fast. Consistent rainfall can raise or lower water levels dramatically. Sometimes overnight.
A section that’s calm and easy one day can become fast and technical the next, depending on recent rainfall. After heavy rain, water levels rise quickly and may introduce Class II rapids, strainers, or stronger currents, even in sections that are normally mellow.
It just all depends on the rain!
Because of this, you won’t get to choose exactly which section you float if you’re renting a canoe or kayak through an outfitter. The put-in and take-out points are decided by the outfitter based on real-time river conditions, water safety, and what’s actually navigable on the day of your float.
My recommendation is to check with the local outfitters since they monitor river conditions daily and can tell you what sections they are floating. I also recommend calling multiple outfitters, since they float on different sections based on their access points.
But even if the outfitter tells you when you book that they’re floating a certain section, that could change by the time you arrive a few days later. The river dictates the plan, and the outfitters follow it to keep everyone safe and moving.
If you’re set on floating a specific stretch, you’ll need to visit during a season when that section is typically floatable. Even then, it’s never a guarantee.
But here’s the good news: Every section of the Buffalo River is beautiful in its own way. You’re going to have an awesome time no matter what.

When Is the Best Time to Float the Buffalo River?
You can technically float the Buffalo River year-round, as long as the water levels are high enough.
The main Buffalo River float season runs from April through August, when the weather is warm and water levels are high enough.
- The Upper Buffalo is generally best floated during April and May, when spring rains keep the water high enough. This section usually becomes too shallow to float by summer.
- The Middle and Lower Buffalo are generally best during June and July.
But keep in mind that the floatability of any section of the Buffalo is entirely dependent on rainfall.
Too little rain, and you’ll be dragging your boat over gravel bars.
Too much rain, and the river can become too dangerous to float.

Which Outfitter Should You Choose for Your Buffalo River Float Trip?
The Buffalo River is managed by the National Park Service, and only authorized outfitters are allowed to rent canoes and kayaks to use on the river. The good news is that all of these outfitters are licensed and reputable.
However, the key factor when choosing an outfitter is their location. Each outfitter only serves certain sections of the river, and they typically operate at the access points closest to their establishment. For example:
- The Upper Buffalo (Boxley to Carver) has five outfitters that run trips in that region.
- The Middle Buffalo (Carver to S. Maumee) is served by a different set of four outfitters.
- The Lower Buffalo (N. Maumee to Buffalo City) has its own group of three outfitters as well.
So, when planning your trip, it’s important to first decide which general area of the river you want to float. Then, look for outfitters that operate in that area.
Another thing to keep in mind is that each outfitter may float different stretches of river on a given day, depending on water levels and access.
For example, when I last floated the Upper Buffalo, one outfitter told me they were running from Steel Creek to Kyle’s Landing, while another was floating Hasty to Carver. Both are technically in the upper region, but quite different in experience and distance.

How Does the Vehicle Shuttle Work?
When you float the Buffalo River, your put-in and take-out points are often miles apart.
So how do you get back to your vehicle after your float?
All authorized outfitters on the Buffalo offer a vehicle shuttle system. Here’s how it works:
- You drive to the put-in location (where you start your float).
- You tag your keys and hand them over to the outfitter and one of their staff drives it to the take-out point (where your float ends).
- You float the river in your canoe or kayak, and when you reach the take-out, your vehicle is already there waiting for you.
It’s an efficient system where you don’t have to wait around for a van or coordinate a pickup. You just float down the river, and your vehicle is there for you at the end.
Should You Float the Buffalo in a Canoe or a Kayak?
When you plan your float trip on the Buffalo River, one of your first decisions is whether you want to float it in a kayak or canoe.
I’ve floated the Buffalo in both, and have no doubt that the kayak is the best choice for beginners.
Why kayaks are better for beginners
Kayaks are lighter, easier to control, and more stable, even in small rapids or bumpy sections.
One of the biggest advantages of using a kayak on the Buffalo is how well it handles shallow water. Dragging on the riverbed is a common issue on the Buffalo, especially in late summer. I’ve been amazed at how easily a kayak just glided over low spots where a canoe would definitely drag.
But the big downside of a kayak is its limited storage. Most kayaks only have room for a small cooler or dry bag, and maybe a backpack that you wear. That’s fine for a few hours on the river, but not for overnight camping. Also, most rental kayaks are single-person only, but some outfitters offer two-person kayaks.

When you should use a canoe instead
Canoes are bigger, hold a lot more gear, and can carry two people, plus a child or dog. If you’re planning an overnight or multi-day float, a canoe is almost always the better choice because you can pack a full-sized cooler, bags, tents, and all your gear.
But their trade-off is that canoes are harder to control, especially in fast sections of the river.
Canoes are also much heavier than a kayak, so you are more prone to dragging on the riverbed.
And of course, canoes have the propensity to tip over when they turn sideways or if their center of gravity is too high.
So if you’ve never paddled before, I don’t recommend two beginners sharing a canoe. They will both get frustrated. Instead, try to pair a more experienced paddler in the back (they steer) with someone lighter or newer in the front.

What to Bring on Your Buffalo River Float Trip
You don’t need much to float the Buffalo. If you rent a canoe or kayak, your outfitter will provide the boat, paddle, lifejacket, and a mesh trash bag. But there are a few things you should bring yourself:
- Swim clothing
- Water shoes or an old pair of sneakers
- Sun hat or baseball cap
- Sunscreen
- Sunglasses
- Small cooler to keep your things inside
- Bungee cords or rope to tie down your gear
- Dry bag if you bring electronics
- At least 2 liters of water per person
- Lunch and snacks

How to Load Your Canoe Properly
1. Balance Side to Side
Make sure the weight is evenly distributed left to right. If one side is heavier, your canoe will lean and become harder to control.
On my last float trip, I had to keep shifting my cooler around to counterbalance my dad’s dog, Xigua, who couldn’t sit still. Fun times.
2. Weight Toward the Back
Front-to-back balance matters even more. Always load slightly more weight toward the back of the canoe. This helps the canoe track straight. If you put too much weight up front, the canoe will tend to turn around 180º.
3. Tie Everything Down
When packing your canoe, make sure that everything is tied down and secured. If you flip (it does happen, even to experienced paddlers), loose gear will float off faster than you can grab it.
Use bungee cords or rope to keep everything attached to the canoe. On our last float trip we used dog leashes to strap our coolers in and they worked fine.
4. Expect Everything to Get Wet
Assume anything you bring will get wet. Leave things that can’t get wet at home. If you bring your phone, make sure it’s sealed up tight in a ziploc at minimum, and keep it in a bag that’s tied off to your canoe so it doesn’t sink to the bottom of the river if you tip over.

How to check Buffalo River water levels
The official Buffalo River levels website from the USGS has a handy map showing river levels. It’s color-coded, so you can easily see which stretches of the river are too low, just right, or running high.
I also found this Current Buffalo River Levels page helpful in planning my float trip on the Buffalo River.

My top 3 tips for navigating whitewater rapids on the Buffalo River
There are two main types of water you’ll encounter while paddling the Buffalo River. These areas alternate throughout your float.
First, there are the calm sections. These sections of the river are rather flat and slow-moving so you can sit back, relax, and take in the scenery without much effort or stress.
Then there are the rapids. These are shorter, faster-moving sections of water where the river drops slightly in elevation. The rapids have rougher water, tight turns, and sometimes shallow spots and obstructions. The rapids in the Buffalo River are not extreme, but they do require more focus and control.
1. Approach is everything
When you’re heading into a rapid, your approach plays a huge part. You need to start setting up well in advance. Position your boat so you set yourself up to navigate the rapid at the best route.
Every rapid is a little different, so there’s no one-size-fits-all approach. But after running a few, you’ll start to pick up on patterns and get a feel for how to line up your canoe or kayak for the smoothest ride through the rapids.

2. Paddle to power through the rapids
It might seem counterintuitive but you should almost always be paddling when you’re in the rapids. If you stop paddling, the river will take control and spin your canoe or kayak wherever it wants.
To stay in control, you need to keep paddling: forward to power through the rapids, or backward on one side to re-angle and steer. It’s less about speed and more about maintaining your desired direction.
3. Get low when navigating rapids
If you’re paddling a canoe, I recommend getting low in your canoe for all the rapids. Lowering your center of gravity makes you far less likely to flip. Canoe seats are high and comfortable, but sitting on them makes the boat top-heavy. If you hit a rapid at the wrong angle while sitting on a canoe seat, you’re a lot more likely to tip over.
On our last Buffalo River float, my dad didn’t use his canoe seat at all. He just sat on the bottom of the canoe the entire time.
I did something similar. I stayed on the seat during the calm, flatwater sections, but for all the rapids, I dropped down to my knees in the bottom of the boat. That extra stability from a lower center of gravity made a big difference when the water got unpredictable in the rapids.

Floating the Buffalo River: My Experience
After a few days of hiking in the Ozarks, our legs needed a break. So we decided to swap our hiking boots for paddles and do a float trip down the Buffalo River.
My dad, his wife Wen, and their two dogs, Xigua and Camina, joined came along for the excursion.
We arrived at Buffalo Outdoor Center around 8:30 AM on a Friday in April, and it was already busy. Not surprising. Spring is the prime season for floating the Upper Buffalo. Since we had the dogs, we had reserved two canoes for extra space.
After checking in, we got a tag for our car keys for the vehicle shuttle, then drove about 15 minutes to our put-in point at Steel Creek.
At Steel Creek, we met up with the outfitter’s crew, handed them our car keys, and got set up with our canoes, paddles, and life jackets right on the shore. From that point on, we were on our own to paddle 8 miles downriver to Kyle’s Landing.
We loaded up our coolers, got the dogs settled in, and pushed off our canoes into the Buffalo River to start our float!
Right away the river had a ton of action for us. There’s a rapid right at the put-in point at Steel Creek. No chance for a warm-up.

We hit the first rapid, then pulled off onto a gravel bar to re-adjust our loads. I rotated my cooler so I could reach it more easily, and my dad cleared out a spot to sit in the bottom of the canoe to lower his center of gravity after a sketchy experience on the first rapid. Lesson learned.
From there, it was game on.
We paddled downstream through a mix of calm river and whitewater rapids. Some rapids were shallow, so I had to be strategic with the route I chose.


My advice is to always aim for deeper water in the rapids to avoid dragging or getting stuck. Getting stuck in the middle of a rapid is when you’re most likely to tip over.
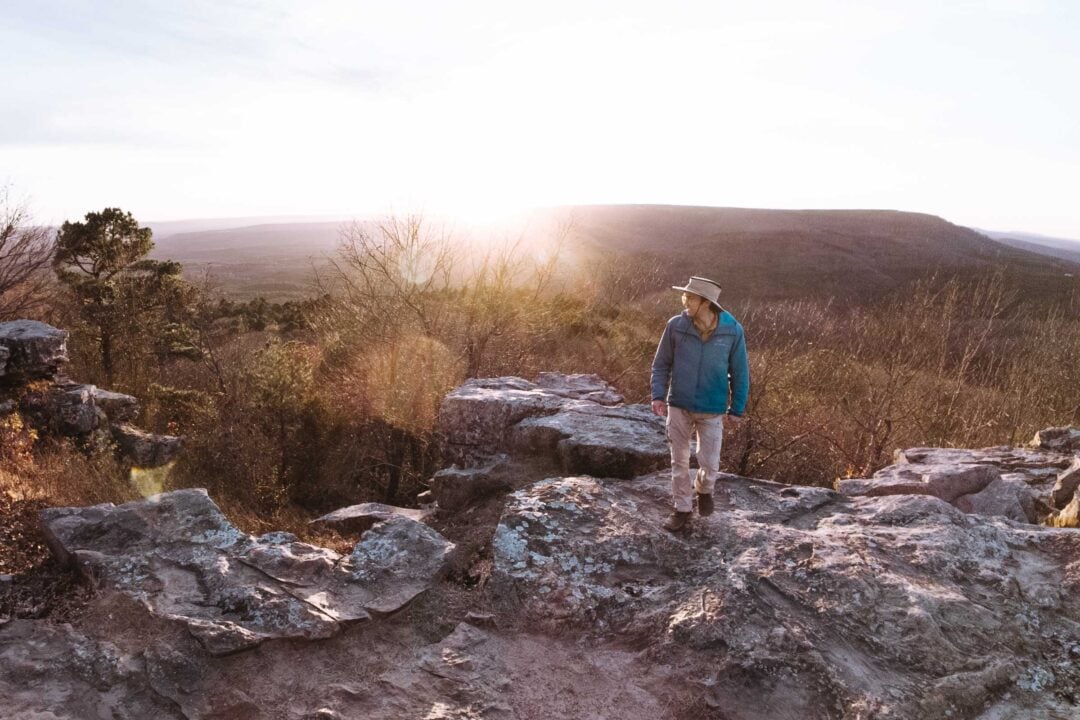
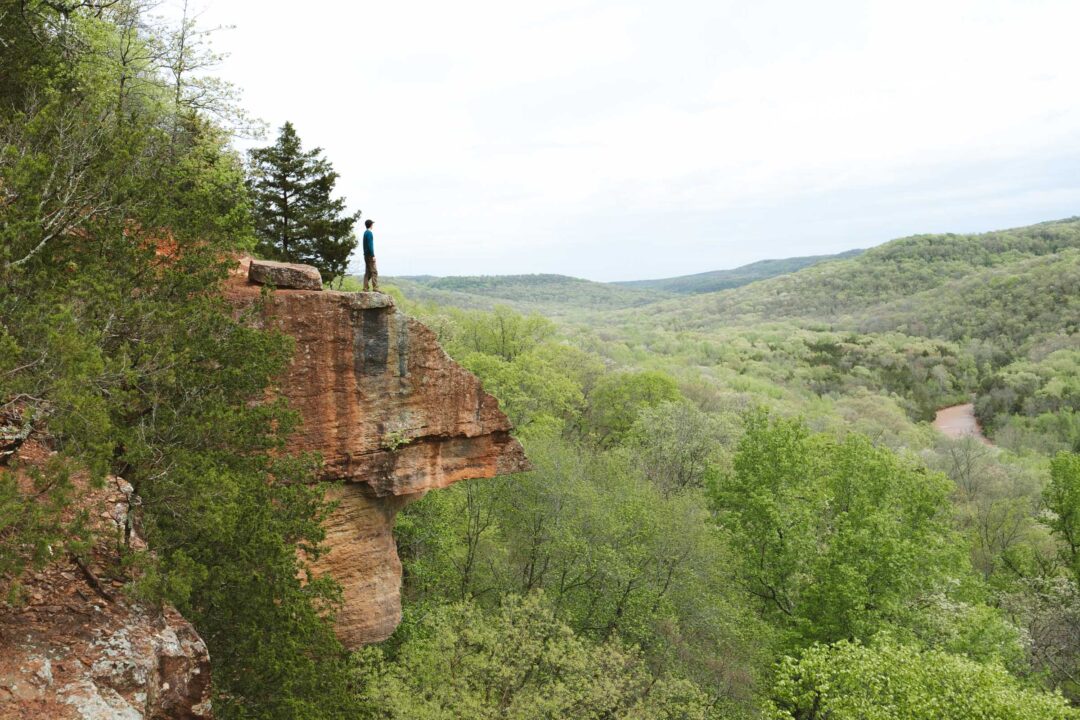
The scenery on the Upper Buffalo was next-level. Massive bluffs were waiting around nearly every bend, and within the first hour, we were paddling past Big Bluff.
We spotted Big Bluff because we had been there before. The day prior, we were up there hiking through Big Bluff’s narrow, carved-out trail, and now we were down in the river looking up at Big Bluff from a different perspective. We came full circle.
Read the full blog post: Centerpoint to Big Bluff Goat Trail: Complete Hiking Guide
Just past Big Bluff, we pulled over at a gravel bar to let the dogs stretch and take our first break. The dogs were getting a little antsy from being stuck in the canoes, and we were getting a little hungry.
We took some time to admire Big Bluff from below and waved at fellow paddlers going by. There are so many little scenic pull-off points on the river that it’s hard not to just want to hang out at every little spot you see.

We hopped back in our canoes and continued our float. Our next stop was Hemmed-In Hollow Falls, the tallest waterfall in Arkansas. While many people hike several miles to get there, it’s just a short 0.7-mile trail from the river. A nice little side trip for our float.
I tracked the trailhead on GPS as we paddled downstream. But when we got there, the shore was full of other canoes and kayaks, so it was obvious where the trailhead was. It would have been easy to miss if there weren’t so many boats pulled up on the shore.
There’s no clear signage for the Hemmend-In-Hollow Trailhead from the river, so if you’re floating when nobody else is on the river, definitely use your phone to keep track of its location.
We parked our canoes on the shore and started up the trail. The hike wasn’t difficult, but it got very muddy and slippery near the falls. It was totally worth it though.


Hemmed-In Hollow was one of the most epic waterfalls I’ve been to. The 209-foot waterfall dropped into a bowl-shaped limestone canyon, and wind gusts blew the cascade around. As I walked under the waterfall, drops of water danced around me. I’ve been to a lot of waterfalls, but never one that seemed so alive.


Back at the river, we were starving. Time for lunch. The trailhead was crowded, so we paddled downstream a bit and found a quiet gravel bar to relax at. We pulled out our coolers, made some massive sandwiches, and finished our meal with Clif bars. A modern American outdoors meal.


From then forward, I was fueled up and powered through the rest of the river with a bit more confidence. Every rapid was a new technical challenge to see how cleanly I could run it without getting stuck.
Funny enough, my biggest challenge was keeping my canoe straight. Xigua kept moving around in the canoe. I kept having to shift my cooler around to counterbalance him. Something to keep in mind if you float the buffalo with a dog.

By the time we reached Kyle’s Landing, we were tired but happy. An 8-mile float with a waterfall hike will do that to you. The outfitter staff was already there, waiting to collect our canoes on the shoreline.
We offloaded our gear, leashed up the dogs, and walked up to the parking lot. Our car was already waiting for us thanks to the vehicle shuttle. Easy peasy.
Floating the upper Buffalo River was such an epic adventure. I’ve floated the middle and lower sections of the river many times, but the Upper Buffalo was hands down the most scenic with its massive bluffs and waterfall hike in between. I already can’t wait to go back, maybe next time to camp.

Buffalo National River Photos


Looking for more things to do in Arkansas?
I grew up spending my summers in Arkansas and have been all over the state. To help fellow adventurers, I’ve put together guides to the best places I found. You can check them out by clicking the links below.
- My ultimate Arkansas hiking guide: 8 Incredible Hikes in Arkansas: Complete Travel Guide
- Best canoe/kayak adventure in Arkansas: How to Float the Buffalo River
- My favorite hike in Arkansas: Seven Hollows Trail
- Best waterfall hike in Arkansas: Cedar Falls Trail
- Most dangerous hike in Arkansas: Centerpoint to Big Bluff Goat Trail

I hope you enjoyed my guide to floating the Buffalo National River in Arkansas. Feel free to leave a comment below if you have any questions 🐸