Kawasan Falls Canyoneering has completely changed after Typhoon Odette.
Gone are the days when you could simply hire a local guide on the spot and jump straight into the adventure. Now, the government has stepped in with stricter regulations to improve safety and manage the influx of tourists.
But what many people don’t realize is that there are two different canyoneering routes to Kawasan Falls, and your experience can vary dramatically depending on which route you choose—and even what time of day you go.
In this guide, I’ll break down everything you need to know before canyoneering in Kawasan Falls, including the different routes, what to expect, and our top tips for making the most of your adventure.

Kawasan Falls Canyoneering Complete Guide
Here are the key things you need to know about Canyoneering to Kawasan Falls:
1. Kawasan Falls is the Final Stop, Not the Route
Kawasan Falls is where your canyoneering ends, not where it happens.
You’ll be trekking, jumping, and swimming through a series of waterfalls and canyon pools upstream of Kawasan Falls before finally reaching Kawasan Falls at the very end.
2. Two Routes Lead to Kawasan Falls
There are two canyoneering routes you can take:
- Alegria Route – The longer route, which includes an upper section of the canyon.
- Badian Route – The shorter route.

3. Canyoneering is Strictly Regulated
Kawasan Falls canyoneering is government-regulated, meaning:
- You must go with a licensed guide. Self-guided trips are not allowed.
- You must wear a helmet and life jacket for the entire canyoneering adventure.
- There is a strict guide-to-tourist ratio for safety.
4. How Long Does the Canyoneering Take?
Expect the entire experience to take 4–5 hours not including transportation to/from Moalboal, Cebu City, etc. This includes:
- Meeting at the tour operator’s office
- Getting geared up and transported to the starting point
- The actual canyoneering adventure (about 3–4 hours)
- Ending at Kawasan Falls and returning to the office
5. Typhoon Odette Changed Kawasan Falls
In December 2021, Typhoon Odette dramatically changed Kawasan Falls and the canyon:
- The main Kawasan waterfall now has two cascades instead of one. This is an easy way to tell whether a photo was taken before or after December 2021.
- The typhoon altered the canyon’s geography, making many sections shallower.
- Before the typhoon, there were more cliff jump opportunities in the canyon. Now, some areas have lower water levels, and you’ll walk over rocky sections where water once flowed.
That said, Kawasan Falls canyoneering is still an absolute must-do and was hands-down one of the best tours we’ve ever experienced.
There are a few different ways to organize your trip for Kawasan Falls Canyoneering, but I recommend booking this top-rated tour online. It covers everything – including the guides, fees, and transportation to and from your accommodation.


Canyoneering Routes for Kawasan Falls
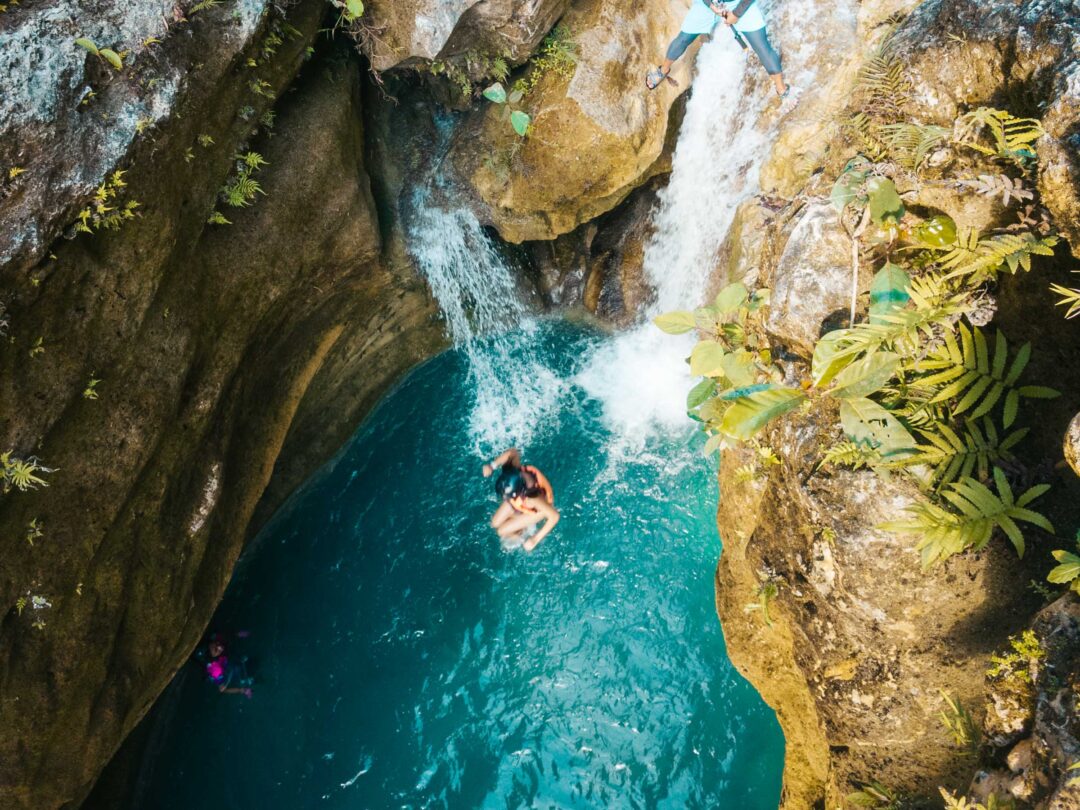
First, let’s clear up a common misconception—you don’t actually jump off Kawasan Falls during canyoneering.
Despite the name, “Kawasan Falls Canyoneering” refers to the adventure through the canyon system above Kawasan Falls, where you’ll navigate cliffs, waterfalls, and natural pools before reaching the final destination: Kawasan Falls itself.
All canyoneering tours are now strictly regulated. Before starting, you’ll watch a mandatory safety video and receive a wristband. These measures help ensure everyone understands the risks and follows safety protocols.
There are two different canyoneering routes. Here’s what you need to know about both:
Route 1: Alegria
The Alegria route is the more popular option—and it’s the one we took.
It starts at Kanlaob Falls and takes you through a longer stretch of the canyon, including sections that those on the Badian route don’t get to see. This means you’ll have a few extra jumps and more time in the water, making it the better choice if you want a longer canyoneering experience.
From the orientation area, it’s just a quick 5-minute walk to the starting point, so you’ll be jumping into the action right away.

Route 2: Badian (The Zip-Line Route)
The Badian route is shorter but offers a zip-line ride that lets you soar over the jungle before starting your canyoneering adventure.
Because this route starts further downstream than the Alegria route, it has fewer jumps and a slightly shorter time in the canyon. However, if you skip the zip-line, be prepared for a 30 to 45-minute walk from the orientation area to the canyoneering starting point.
Kawasan Falls Levels
If you go canyoneering at Kawasan Falls, you’ll often hear guides referring to “Level 1,” “Level 2,” and “Level 3.” These aren’t difficulty ratings, they’re just different sections of the canyon.
If you’re on a canyoneering tour, you’ll start at Level 3, work your way down through Level 2, and finally end at Level 1. Here’s what each level includes:
Level 3: The Canyoneering Zone
This is where the adventure happens. Both the Alegria and Badian routes start at Level 3, which is packed with big jumps, natural slides, and deep pools. This is the real canyoneering section, where you’ll be actively navigating through the canyon.
Level 2: The Dam and Waterfalls
By the time you reach Level 2, the canyoneering part is over. Level 2 is known for its dam and a large waterfall, which make for great photo ops. However, you won’t be doing any more jumping or sliding there.
One thing to note—only people on a canyoneering tour are allowed in Level 2. If you don’t book a tour, you won’t be able to visit this area.

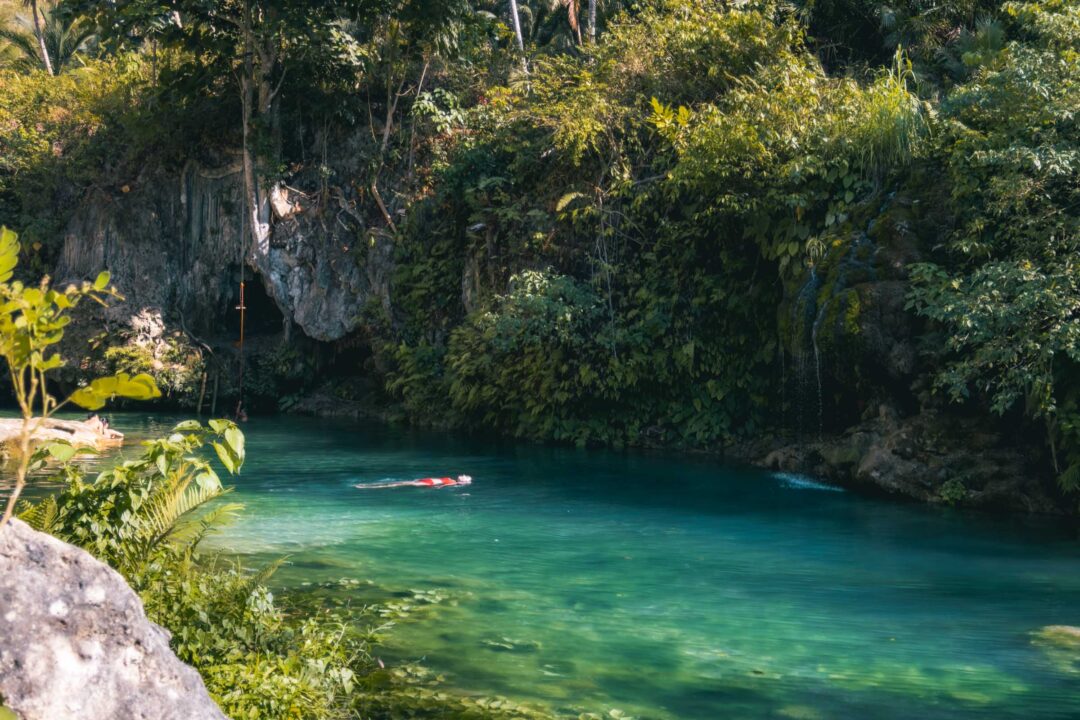
Level 1: The Main Kawasan Falls
Level 1 is where Kawasan Falls is actually located, and it’s the only part of the canyon that’s open to the public. Many people come here just to take photos and enjoy the scenery without doing any of the adventure activities.
This is also where the canyoneering tours end, so after an action-packed journey through the canyon, you’ll finish here, surrounded by the famous milky blue waters of Kawasan Falls.

Kawasan Falls Canyoneering Price
The price for Kawasan Falls canyoneering is set at 2,000 pesos per person. It’s a government-regulated rate that ensures fair pricing across all tour operators.
However, some tours may cost more if they include additional services like transportation, meals, or extra activities. This is completely normal, and the added convenience is often worth it.
Kawasan Falls Canyoneering Tips
- Wear water shoes. You need closed-toe footwear. Some tour operators provide water shoes, but we brought our own. If you don’t own a pair, the shops in Moalboal sell water shoes. As a last resort, you can just wear your normal shoes. Chloe wore crocs.
- Whatever you bring WILL get wet. Leave the dry bag behind. It will only get in your way. When we went, the only things we brought were our waterproof action cameras and some cash for snacks. That was all we needed.
- There is a snack stand mid-way through the canyon. Halfway through the canyon, you’ll find a small snack stand run by locals. It’s a perfect pit stop to recharge and refuel. We grabbed coffee, a grilled meat stick, and a bag of chips, and it was exactly what we needed to keep going.
- Start early to avoid crowds. The earlier, the better. We met our tour operator at 6:00 AM, went through the safety briefing, and were in the canyon by 6:30 AM. Because we started early, we had the entire place to ourselves for a while, eventually only seeing one other group. Another advantage of starting early is that you’ll have the clearest water before large groups arrive and begin to kick up sediment.


Our Experience Kawasan Falls Canyoneering
We did the longer version of Kawasan Falls canyoneering. It started at Kanlaob Falls and is officially known as Alegria Canyoneering.
At the time, we didn’t even realize there were two different routes, but looking back, we’re glad we did this one. It let us explore an extra section of the canyon that many people never get to see.
How we found our guide
We met our guide, Jerome, on our first day in Cebu at Cancalanog Falls. He casually approached us and asked if we’d need a tour guide in the coming days. Gotta respect the hustle.
Turns out, he was in luck because Kawasan Falls canyoneering was right at the top of our Cebu bucket list.
We got his Instagram contact, and the next day, we messaged him to set things up.
If you need a guide, you can message Jerome here.
Another option I recommend is booking this top-rated tour online. It covers everything – including the guides, fees, and transportation to and from your accommodation.
We agreed to meet at his tour company’s office at 6:00 AM on the following day, early enough to beat the crowds.
At the tour office, we geared up with helmets and life jackets, then hopped onto the back of their motorbike for a ride up to the starting point in Alegria.

Once we arrived, we watched a quick safety video and received wristbands with QR codes. Then, we made our way down to Kanlaob Falls, where the real adventure began.
Funny enough, we had actually visited Kanlaob Falls a few days prior, but instead of going to the waterfall this time, we turned and went downstream.
The First Jump
The trail followed the stream, when suddenly the canyon appeared below us. A small waterfall lined with massive boulders served as the starting point.
This was it. Our first jump went straight into the canyon.


As we made our way through, we jumped, slid, swam, and scrambled over rocks. Basically every possible way to move through a watery gorge.
Our guides, Jerome and Jan, were absolute legends—not only making sure we stayed safe but also pointing out the best routes and making sure we had an awesome time.
Looking back, this upper section was easily the highlight of the entire experience. Since most tours skip this part, we had the canyon completely to ourselves.


Everything was going well until we came to a jump where our guide told us we had to go in backward, I was all for it… Chloe not so much. But after some encouragement, she went for it.

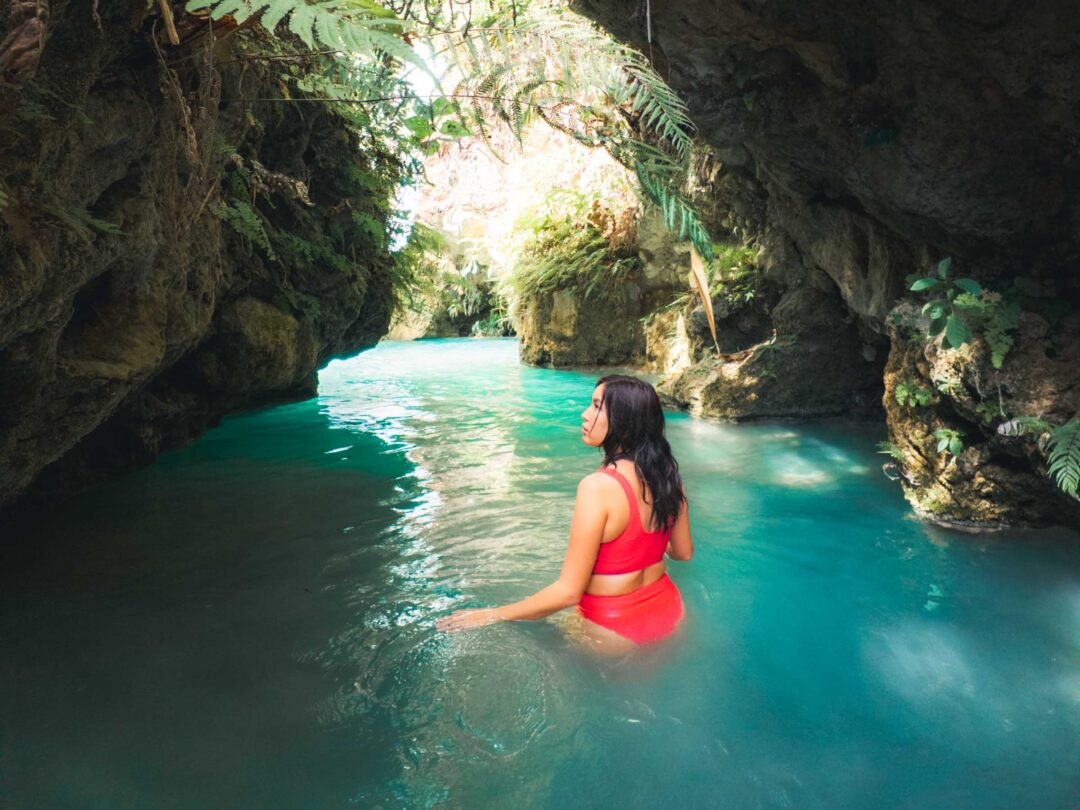
Beyond the adrenaline-fueled jumps, the canyon itself was just incredible. At one point, as we floated through the gorge, I paused to take it all in. Towering limestone cliffs rose above us, covered in vines and ferns, blocking out most of the sunlight.
The only thing breaking the silence was the sound of flowing water echoing through the canyon.
It’s one of those places that you can’t believe even exists.

By the time we reached the midway snack station, we were starting to feel hungry so we grabbed a grilled meat skewer at the snack station.

The big jump
After our break, the canyoneering portion started winding down, with more hiking over boulders and along rocky trails. Our guides helped us through the sketchy sections if we needed it.

Then, we arrived at the end of Level 3. A massive jump from a platform into the deep river below.
This one was so high that we actually had to remove our helmets and life jackets. Otherwise, the impact would knock around the gear while it was strapped on.
While this jump was optional, it felt like a rite of passage, so of course, I had to do it.

Just after I thought I pulled off a big jump, Jerome came in and projectile launched himself far across the river without hesitation. I’m always surprised at how much our guides would absolutely send it. Much respect.

Level 2
From here, we descended into Level 2, where the canyon started to open up. Instead of continuing directly through the river, we walked along a riverside trail.
Level 2 is marked by a dam, where we took a quick dip before reaching the Level 2 waterfall, also known as Kawasan Second Falls. This waterfall was huge, so we swam up to a rock ledge and watched it from afar.

Level 1 – Kawasan Falls
Before we knew it, we had reached Level 1 — Kawasan Falls itself. We descended the stairs behind the waterfall to Kawasan Falls. We walked down the stairs, in from behind the falls where we caught our first glimpse of the waterfall from above.

By now, it was mid-morning, and few bunch of groups had arrived. Even with the crowd, the falls were enjoyable and the place was buzzing with excitement.
Chloe and I swam up to the falls for one final close-up view, and wow, it was even more powerful up close. The sheer volume of the water made it difficult to swim near the falls.

As we exited the canyon, we crossed over a new bridge. Jerome pointed out the remains of the old bridge and explained that the new one was built after Typhoon Odette destroyed the original. Seeing remnants of the past made me wonder what this place was like before the storm.


We finally reached the road, where we got on a tricycle to take us back to the tour office. We said our goodbyes to our guides Jerome and Jan who undoubtedly made this one of the most memorable adventures we’ve ever been on.

Is Kawasan Falls Canyoneering Safe?
I will say that without a doubt, yes, Kawasan Falls canyoneering is extremely safe.
Every canyoneering tour is strictly regulated by the government, and all guides are licensed professionals trained to ensure your safety.
One of the key regulations is that each tourist gets their own guide. That means if you’re in a group of two, you’ll have at least two guides with you.
The guides’ job isn’t just to keep you safe but also to make sure you have an awesome time. They help with jumps, show you the best spots, and even take photos for you. The guides truly go above and beyond.
You’ll be required to wear a life jacket and helmet throughout the canyoneering adventure. Yes, they might not be the most stylish accessories, but they’re 100% necessary. After all, it’s a lot easier to launch yourself headfirst into a deep pool when you know you’re fully protected.
And if the thought of jumping from high cliffs makes you nervous, don’t worry. You don’t have to do the big jumps. Just let your guide know, and they’ll take you on an alternative route around the bigger jumps. Their goal isn’t to push you beyond your comfort zone. It’s to make sure everyone stays safe and has fun.
There are a few different ways to organize your trip for Kawasan Falls Canyoneering, but I recommend booking this top-rated tour online. It covers everything – including the guides, fees, and transportation to and from your accommodation.

Kawasan Falls Canyoneering Photos


Where to Stay in Cebu
For most travelers, Moalboal is the best place to stay. It’s close to the Sardine Run, White Beach, and within range of Kawasan Falls Canyoneering.
Moalboal has a good mix of resorts, hostels, and food spots, making it a solid base for exploring Cebu.
If you’re planning to stay longer than 5 days, I recommend doing what we did by splitting your time between Moalboal and Oslob.
Oslob gives you easier access to whale shark watching, Sumilon Island, and nearby waterfalls like Tumalog and Binalayan. This way, you cut down on travel time and get to see more.
Here’s where we stayed at and recommend in Cebu:
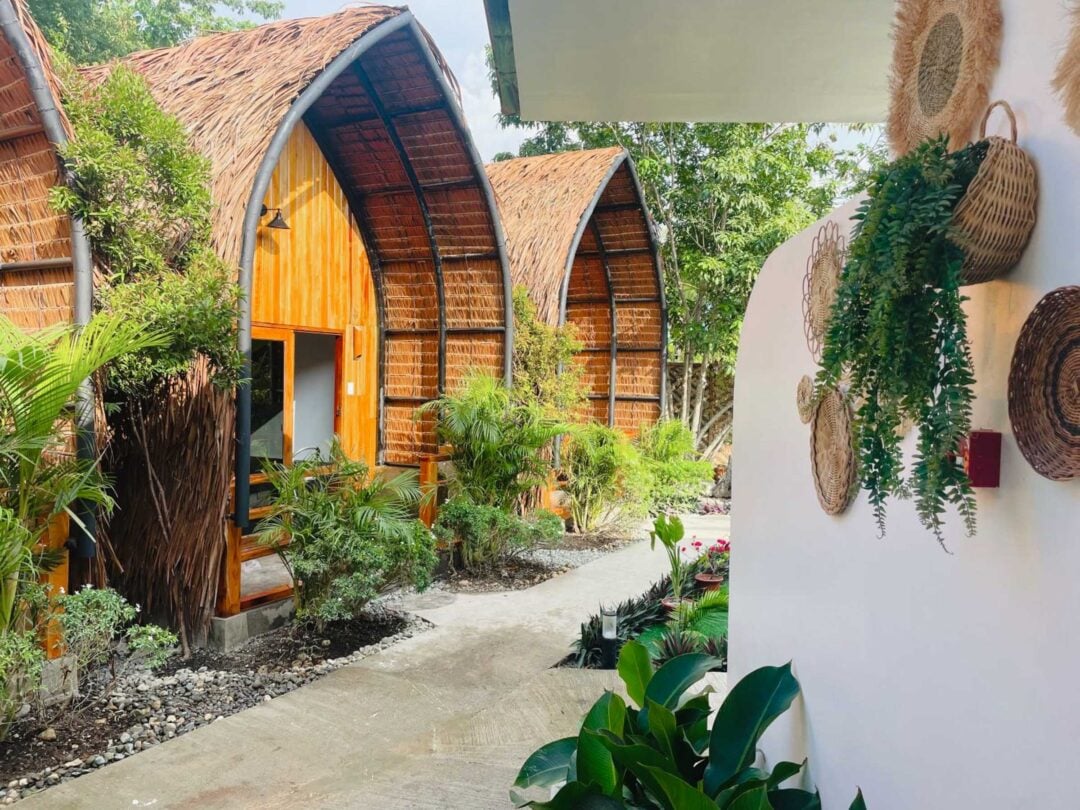
- Moalboal: 3 Sisters Guest House 2 is just off the main strip in Moalboal, but still within walking distance of everything. We appreciated the security and cleanliness of the accommodation and ate breakfast there every morning of our stay.
- Oslob: Melronz Inn is situated a bit outside the town center, making it quieter and more relaxed. And the best part is that it’s located right on the water, with its own private ocean access.

What to Pack for Cebu
- Water Shoes: If you plan to go canyoneering, a solid pair of water shoes like these are needed. If not, you can always wear crocs or even your sneakers if you don’t mind them getting wet!
- Snorkel: With sardine run in Moalboal and whale shark watching in Oslob, it helps to have your own snorkel set like this one for the best experience! Plus, you won’t need to worry about renting a snorkel, which may be of… questionable quality.
- Sunscreen: For some reason, sunscreen is expensive in the Philippines and I’ve even encountered places selling fake sunscreen that doesn’t work! So I recommend bringing your own sunscreen to Cebu.
- Dry Bag: With all the sand, salt, and water flying everywhere during our adventures, I was so glad to have a dry bag to keep all my things safe from the elements!
- Travel Towel: In my opinion, a travel towel like this one is super necessary for a trip to Cebu! It packs down nicely and was there for me anytime I went swimming, or just needed to brush sand or dirt off.

Our Free Cebu Google Maps Locations
Want a free map of all of the locations mentioned in this post? Sign up in the box below and we’ll deliver one right to your inbox, plus our top tips to help you plan your Cebu trip!
Need more Cebu travel ideas?
During our 7-day adventure in Cebu, we found some of the island’s most stunning natural wonders—milky blue waterfalls, limestone hikes, and incredible snorkeling spots. To help fellow adventurers, we’ve put together guides to the best places we found. You can check them out by clicking the links below.
- Start your planning here: Cebu Travel Guide
- Our Ultimate Guide to Cebu: 15 Incredible Things to Do in Cebu
- How to plan your Cebu vacation: Cebu 3 Day Itinerary
- Our Moalboal accommodation guide: Where to Stay in Moalboal
- Our favorite waterfall (+ secret adventure) in Cebu: Inambakan Falls
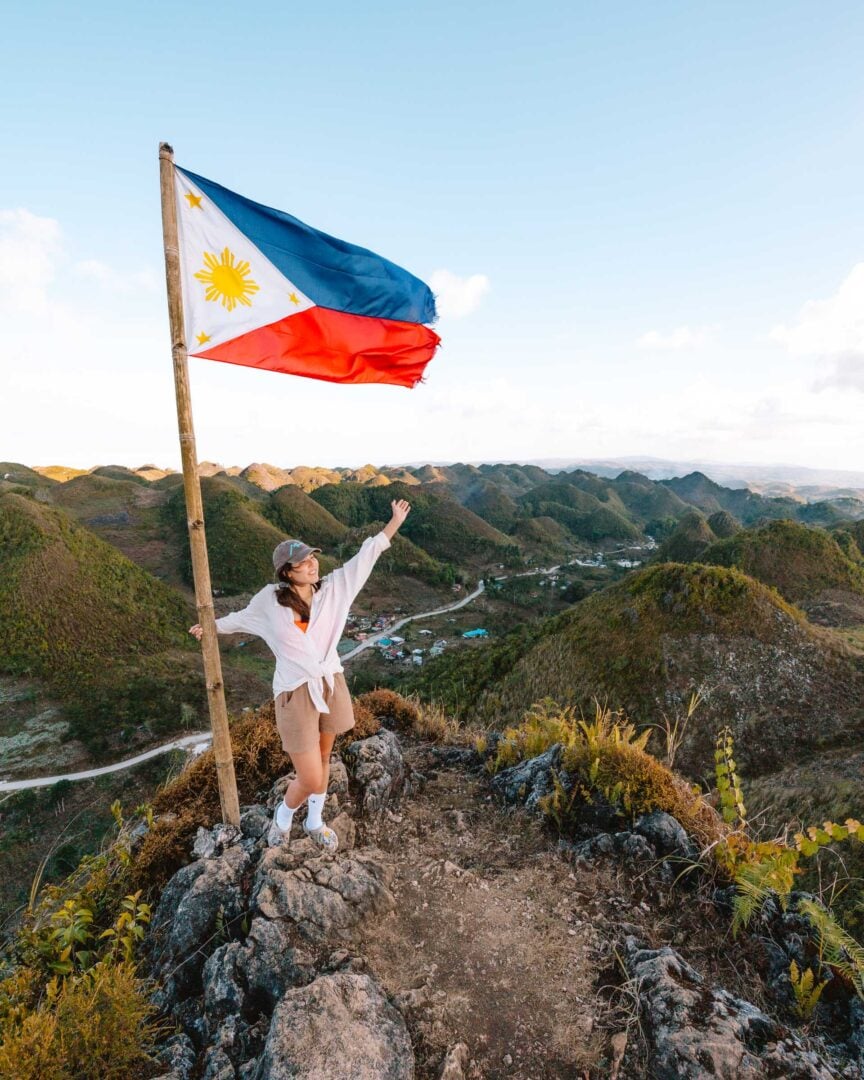
- Hike to the highest point in Cebu: Osmeña Peak
- Our favorite hike in Cebu: Casino Peak
- Our favorite day tour in Cebu: Kawasan Falls Canyoneering
- The hottest hot spring we’ve ever visited: Mainit Hot Spring
- How to see the Moalboal Sardine Run without a tour
- Oslob Whale Shark Watching Complete Guide
- How to get from Cebu City to Moalboal
- How to get from Moalboal to Oslob
- How to rent a motorbike in the Philippines
I hope you enjoyed our guide to Kawasan Falls Canyoneering in Cebu. Feel free to leave a comment below if you have any questions 🐸


Appreciate your thorough review of the Kawasan Falls adventure. I’m in planning stages for a visit – going with our grown kids who will definitely want to canyoneer through. Is there a way to start experience and meet up at end (ie., I would ‘hike’ but not jump off cliffs or zipline? 3 days in Cebu through Oslob (whale sharks), Kawasan, and perhaps Tumalog also. If practical Sumilon would be nice. Thanks so much!
You’re welcome, Sharon! Thanks for reading our article. Unfortunately if you do the tour, there will be times where you have to jump or zipline. If you prefer avoiding jumping altogether then we recommend enjoying the day at Kawasan Falls until your other family members are done with their tour. Its a beautiful place with a flat walk to the falls.
are there lockers ata the site, to leave our things while canyoneering? thank you for providing great details. i appreciate your blog and i’m getting great tips! i’ll buy the things you recommend thru your links so you can get commission. thanks again and keep up the great work!
I don’t recall there being lockers at the canyoneering site. Your tour operator may have lockers available, but ours did not.